Table of Contents
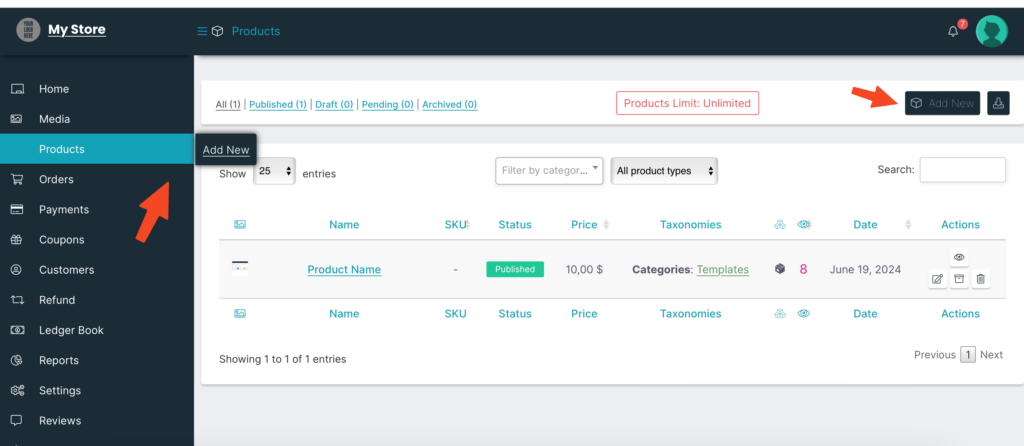
Follow these steps to add a product to your store:
- Navigate to the “Products” section in your dashboard.
- Click on “Add New” to start adding a product.
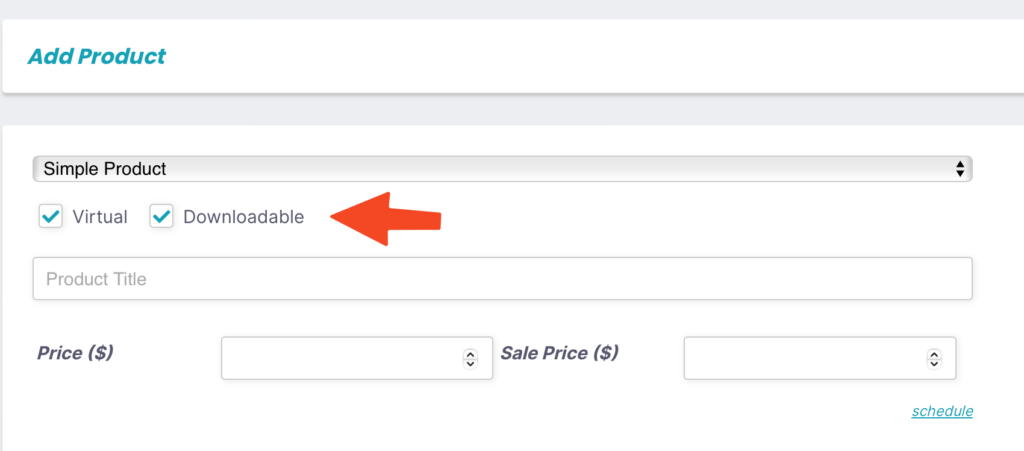
Virtual & Downloadable Options #
- Check the “Virtual” box (as the product does not require shipping) and the “Downloadable” box for digital downloadable files (e.g., eBooks or templates).
Product Title & Pricing #
- Give the product a title. Make it simple and easy to understand.
- Enter the regular price.
- Enter the sale price if the product is on sale/discounted.
- To schedule a sale, click “Schedule” under the sale price and select the sale dates.
Product Descriptions #
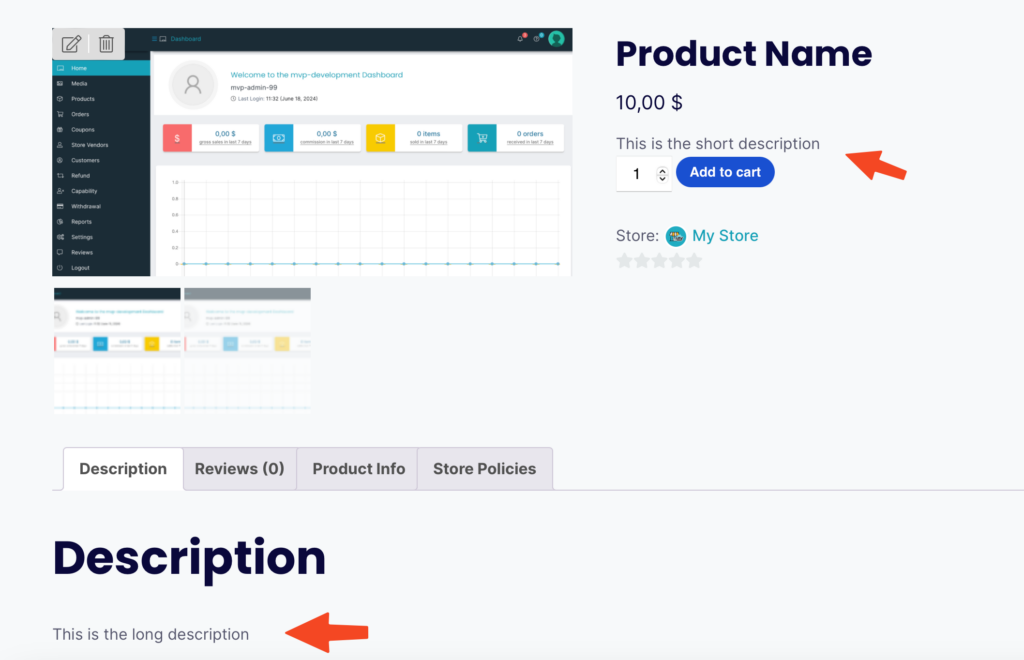
- Add a short description (visible above the “Add to Cart” button).
- Add a long description (visible under the “Description” tab).
- The long description should properly describe the product, its benefits, and its target audience.
Downloadable Files #
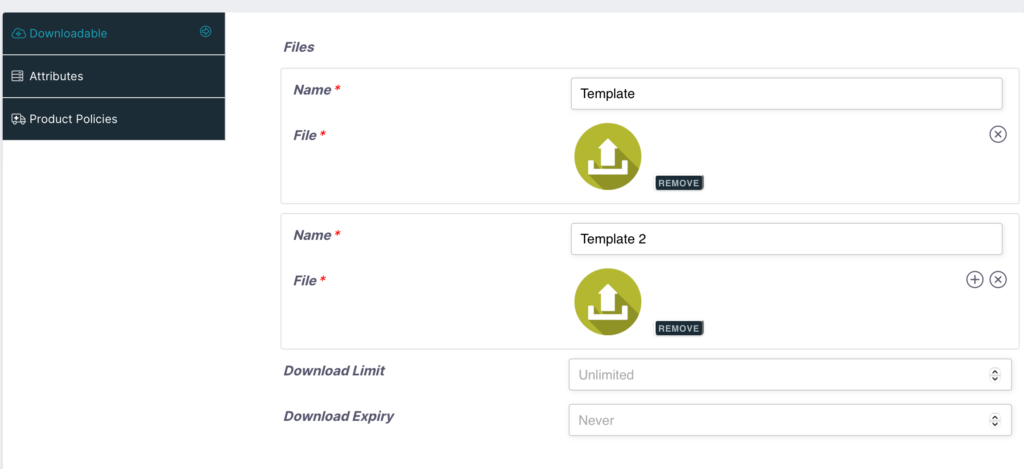
- Scroll down to “Downloadable” to add your file(s).
- Enter the file name (visible to customers, make it clear and simple – e.g. “Template”).
- Click “Upload” to add the product file (e.g., PDF or ZIP folder).
- Click the plus icon to add more files if needed.
- Example: Say your product has two different PDF guides. Add the two different PDFs separately or as one ZIP folder.
Download Limits & Expiry (Optional) #
- Set the download limit (optional). Leave blank for unlimited re-downloads.
- Set the download expiry (optional). Leave blank for no expiration.
Attributes (Optional) #
Attributes can help give more info about the product (e.g. file type or color).
- Click “Add” to include attributes (optional).
- Provide a name and values for the attribute (separate multiple values with “|”).
- Check “Active” and “Visible on the product page.”
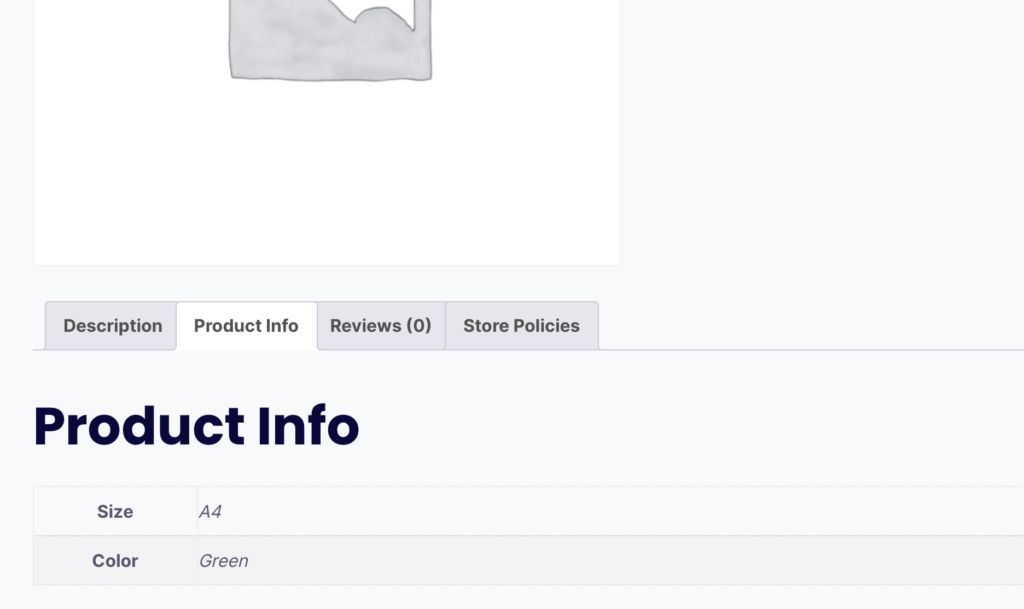
Attributes are visible under “Product Info”:
Product Policies (Optional) #
- Click “Product Policies” under “Attributes” to override store policies for this specific product.
- For example, your store policy may state you do not offer refunds, but you wish to offer refunds for this product.
Images & Categories #
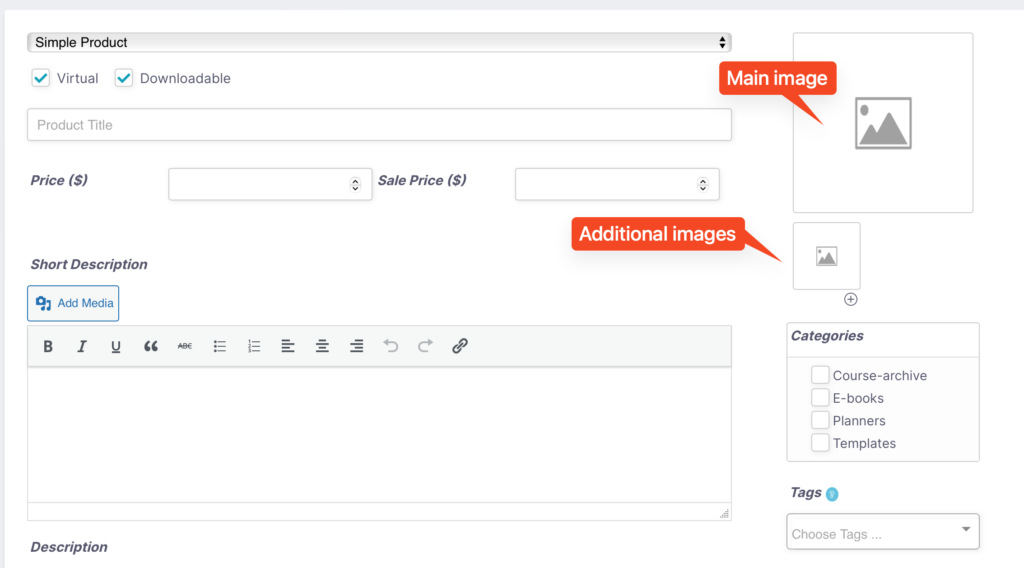
- Add the main product image by clicking the image box on the right.
- To add additional images, click the smaller image box below (optional).
- Select a category and tags if applicable.
Finalize & Submit or Save #
- Scroll to the bottom of the page.
- Click “Draft” to save as a draft or “Submit for Review” to submit the final product.
- Our team will review and publish your product!
You’re done! If you need any help, please get in touch with our support team.
