Here’s how to edit your public instructor profile anyone visiting your profile page (by clicking the instructor name on a course page for example) will be able to see.
To get started, go to your Dashboard > Settings in the left menu:
Profile #

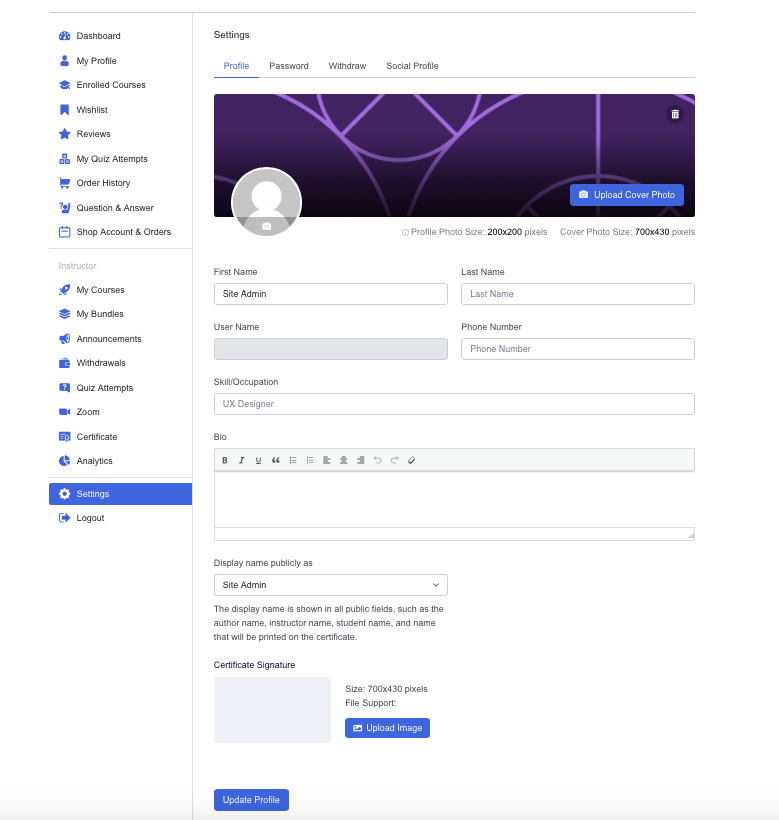
Here, you’ll find fields for the following information (please note that all fields are optional, but we suggest at least entering your name and a bio):
- Cover Picture: Upload a Cover Photo for your profile that will be seen by other users when they visit it. The recommended size is 700 X 430 pixels.
- Profile Picture: Upload a Profile Picture (size should be a maximum of 200 X 200 pixels).
- First Name: Add your first name in this field.
- Last Name: Set your last name in this field.
- User Name: See your user name (this is the only field that is not editable).
- Phone Number: Set a phone number that others can use to contact you.
- Skill/Occupation: Add your skill or occupation in this field.
- Bio: Your bio is a summary that will be displayed on your profile page. You can share information about your qualifications, experience, skills, certifications, and more.
- Display name publicly as: The display name is shown in all public places, such as the ‘instructor name’ on your courses, and is the name that will be printed on the certificate.
- Certificate Signature: Set a signature that will show on the certificates you reward students
- Signature image size: 700×430 pixels
- Supported file formats: jpg, jpeg, or png.
Social Profile #

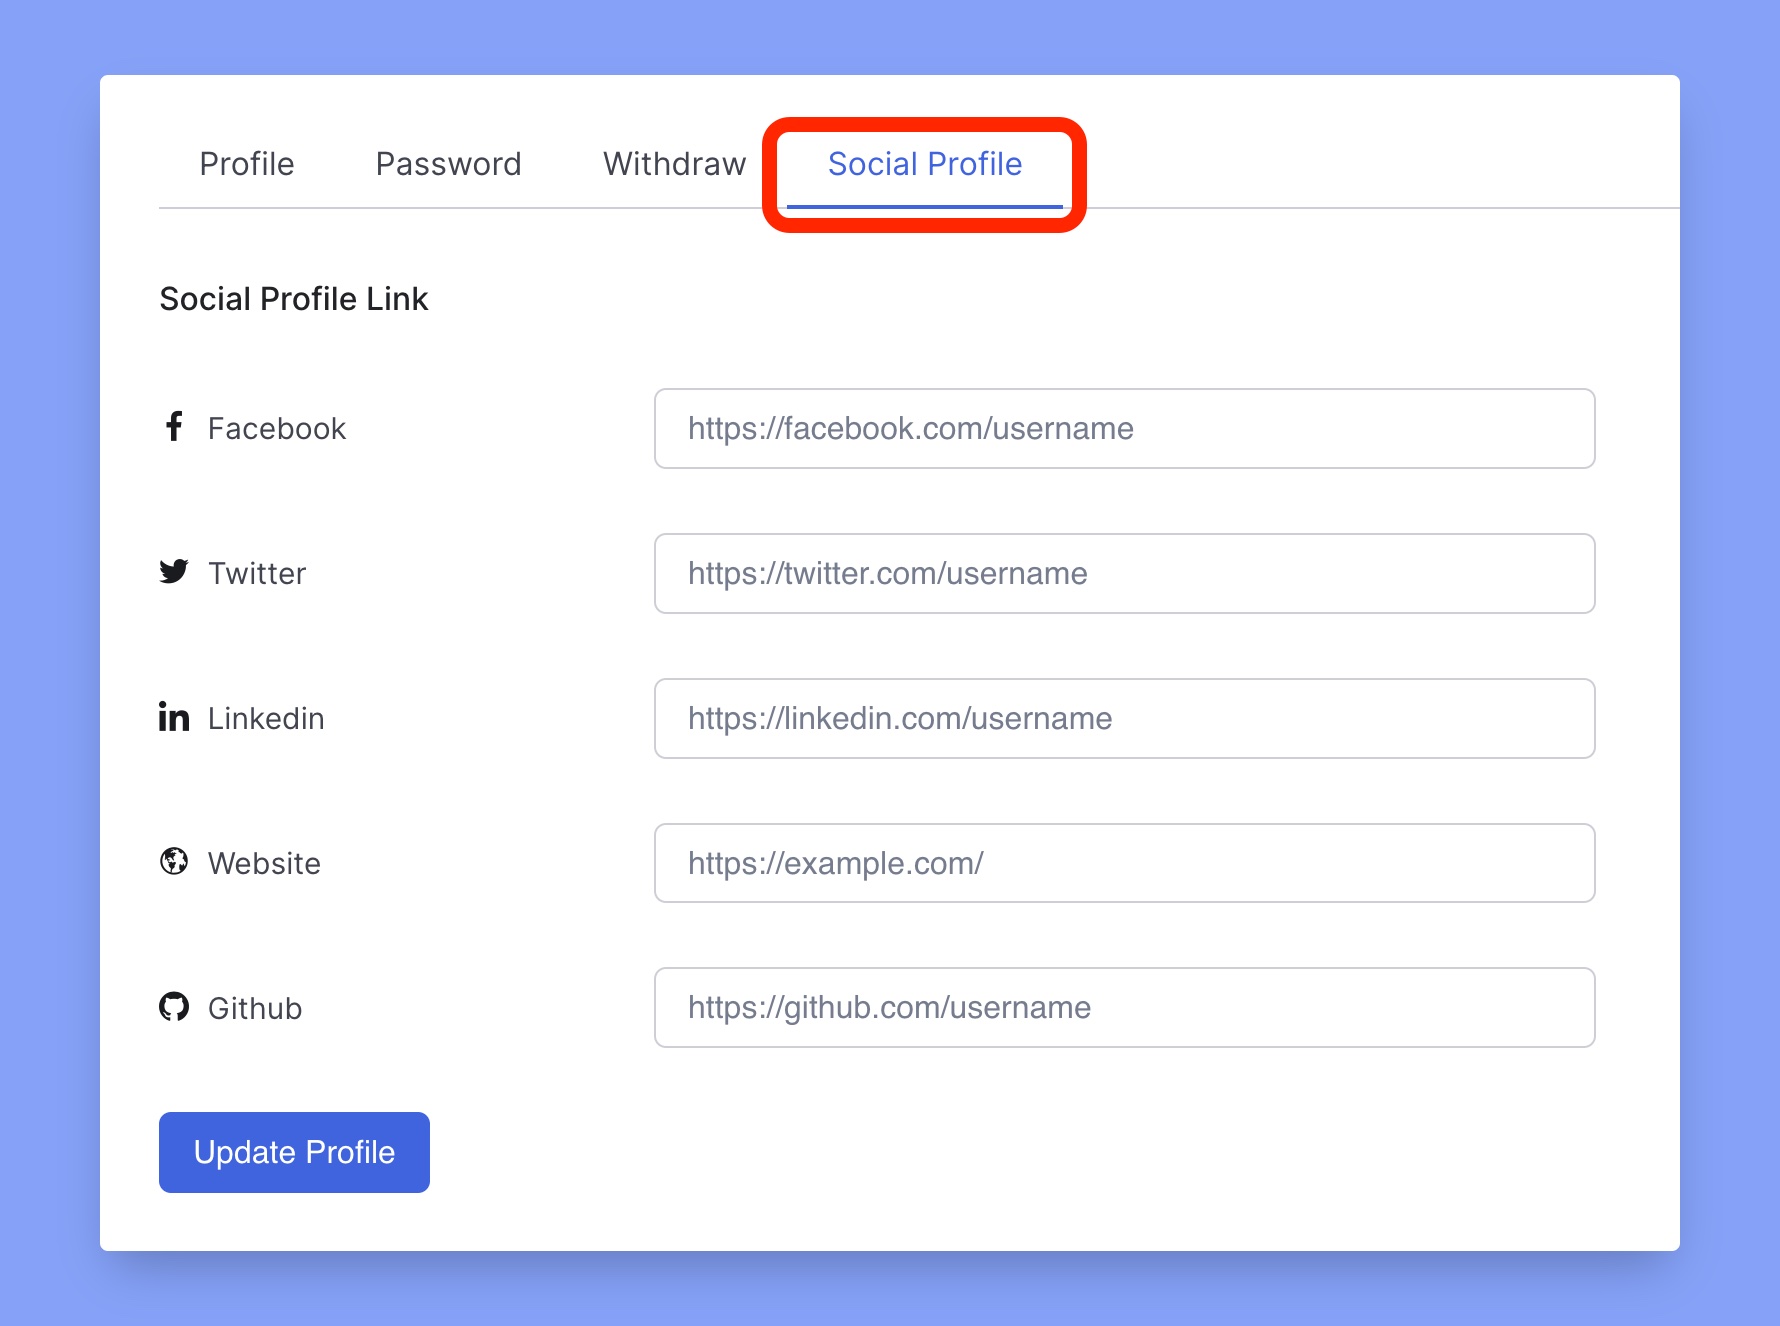
Share your social media handles from this section. (Below are the only available platforms currently. To share another platform, we suggest writing your handles/username in the Bio section):
- Website
- GitHub
View your profile #
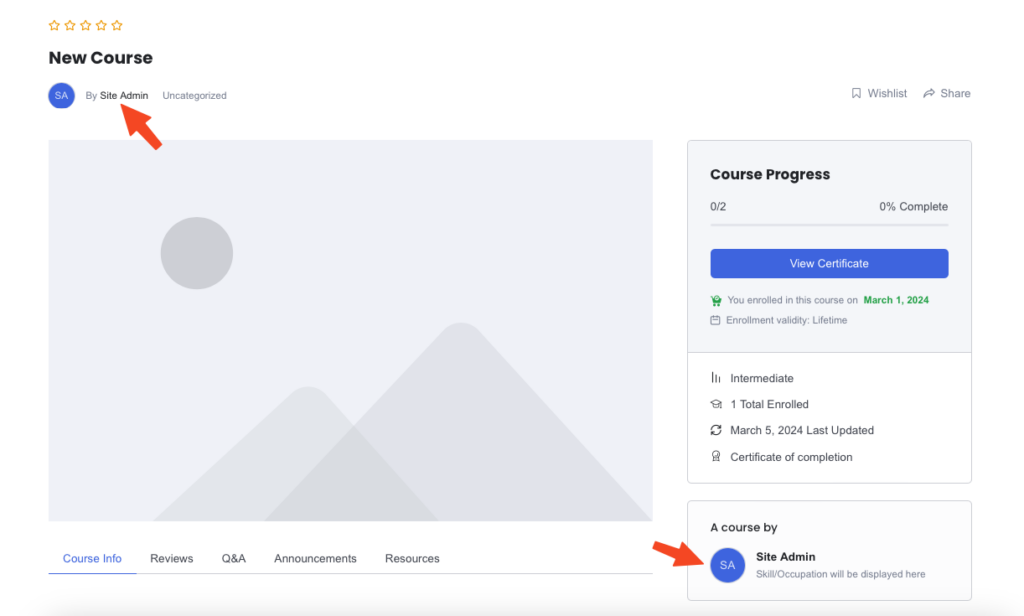
You can view your public profile by clicking your name on any published course:

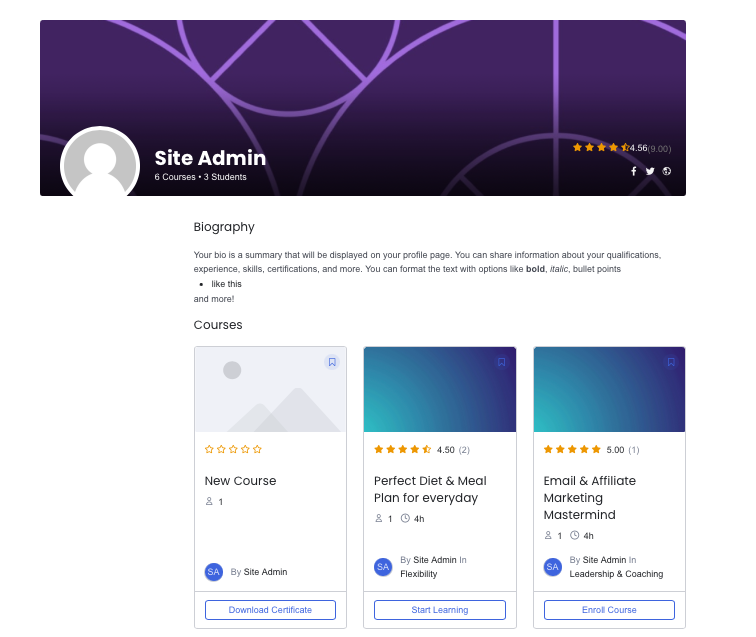
Here is an example of what your profile will look like:

